> ## Documentation Index
> Fetch the complete documentation index at: https://openmetadata-add-ontology-explorer-docs.mintlify.site/llms.txt
> Use this file to discover all available pages before exploring further.
# Implicit flow of Keyclock | Official Documentation
> Configure Keycloak’s Implicit Flow to support secure, frontend-based token issuance for fast browser-based authentication workflows.
# Implicit Flow
### Step 1: Create OpenMetadata as a new Client
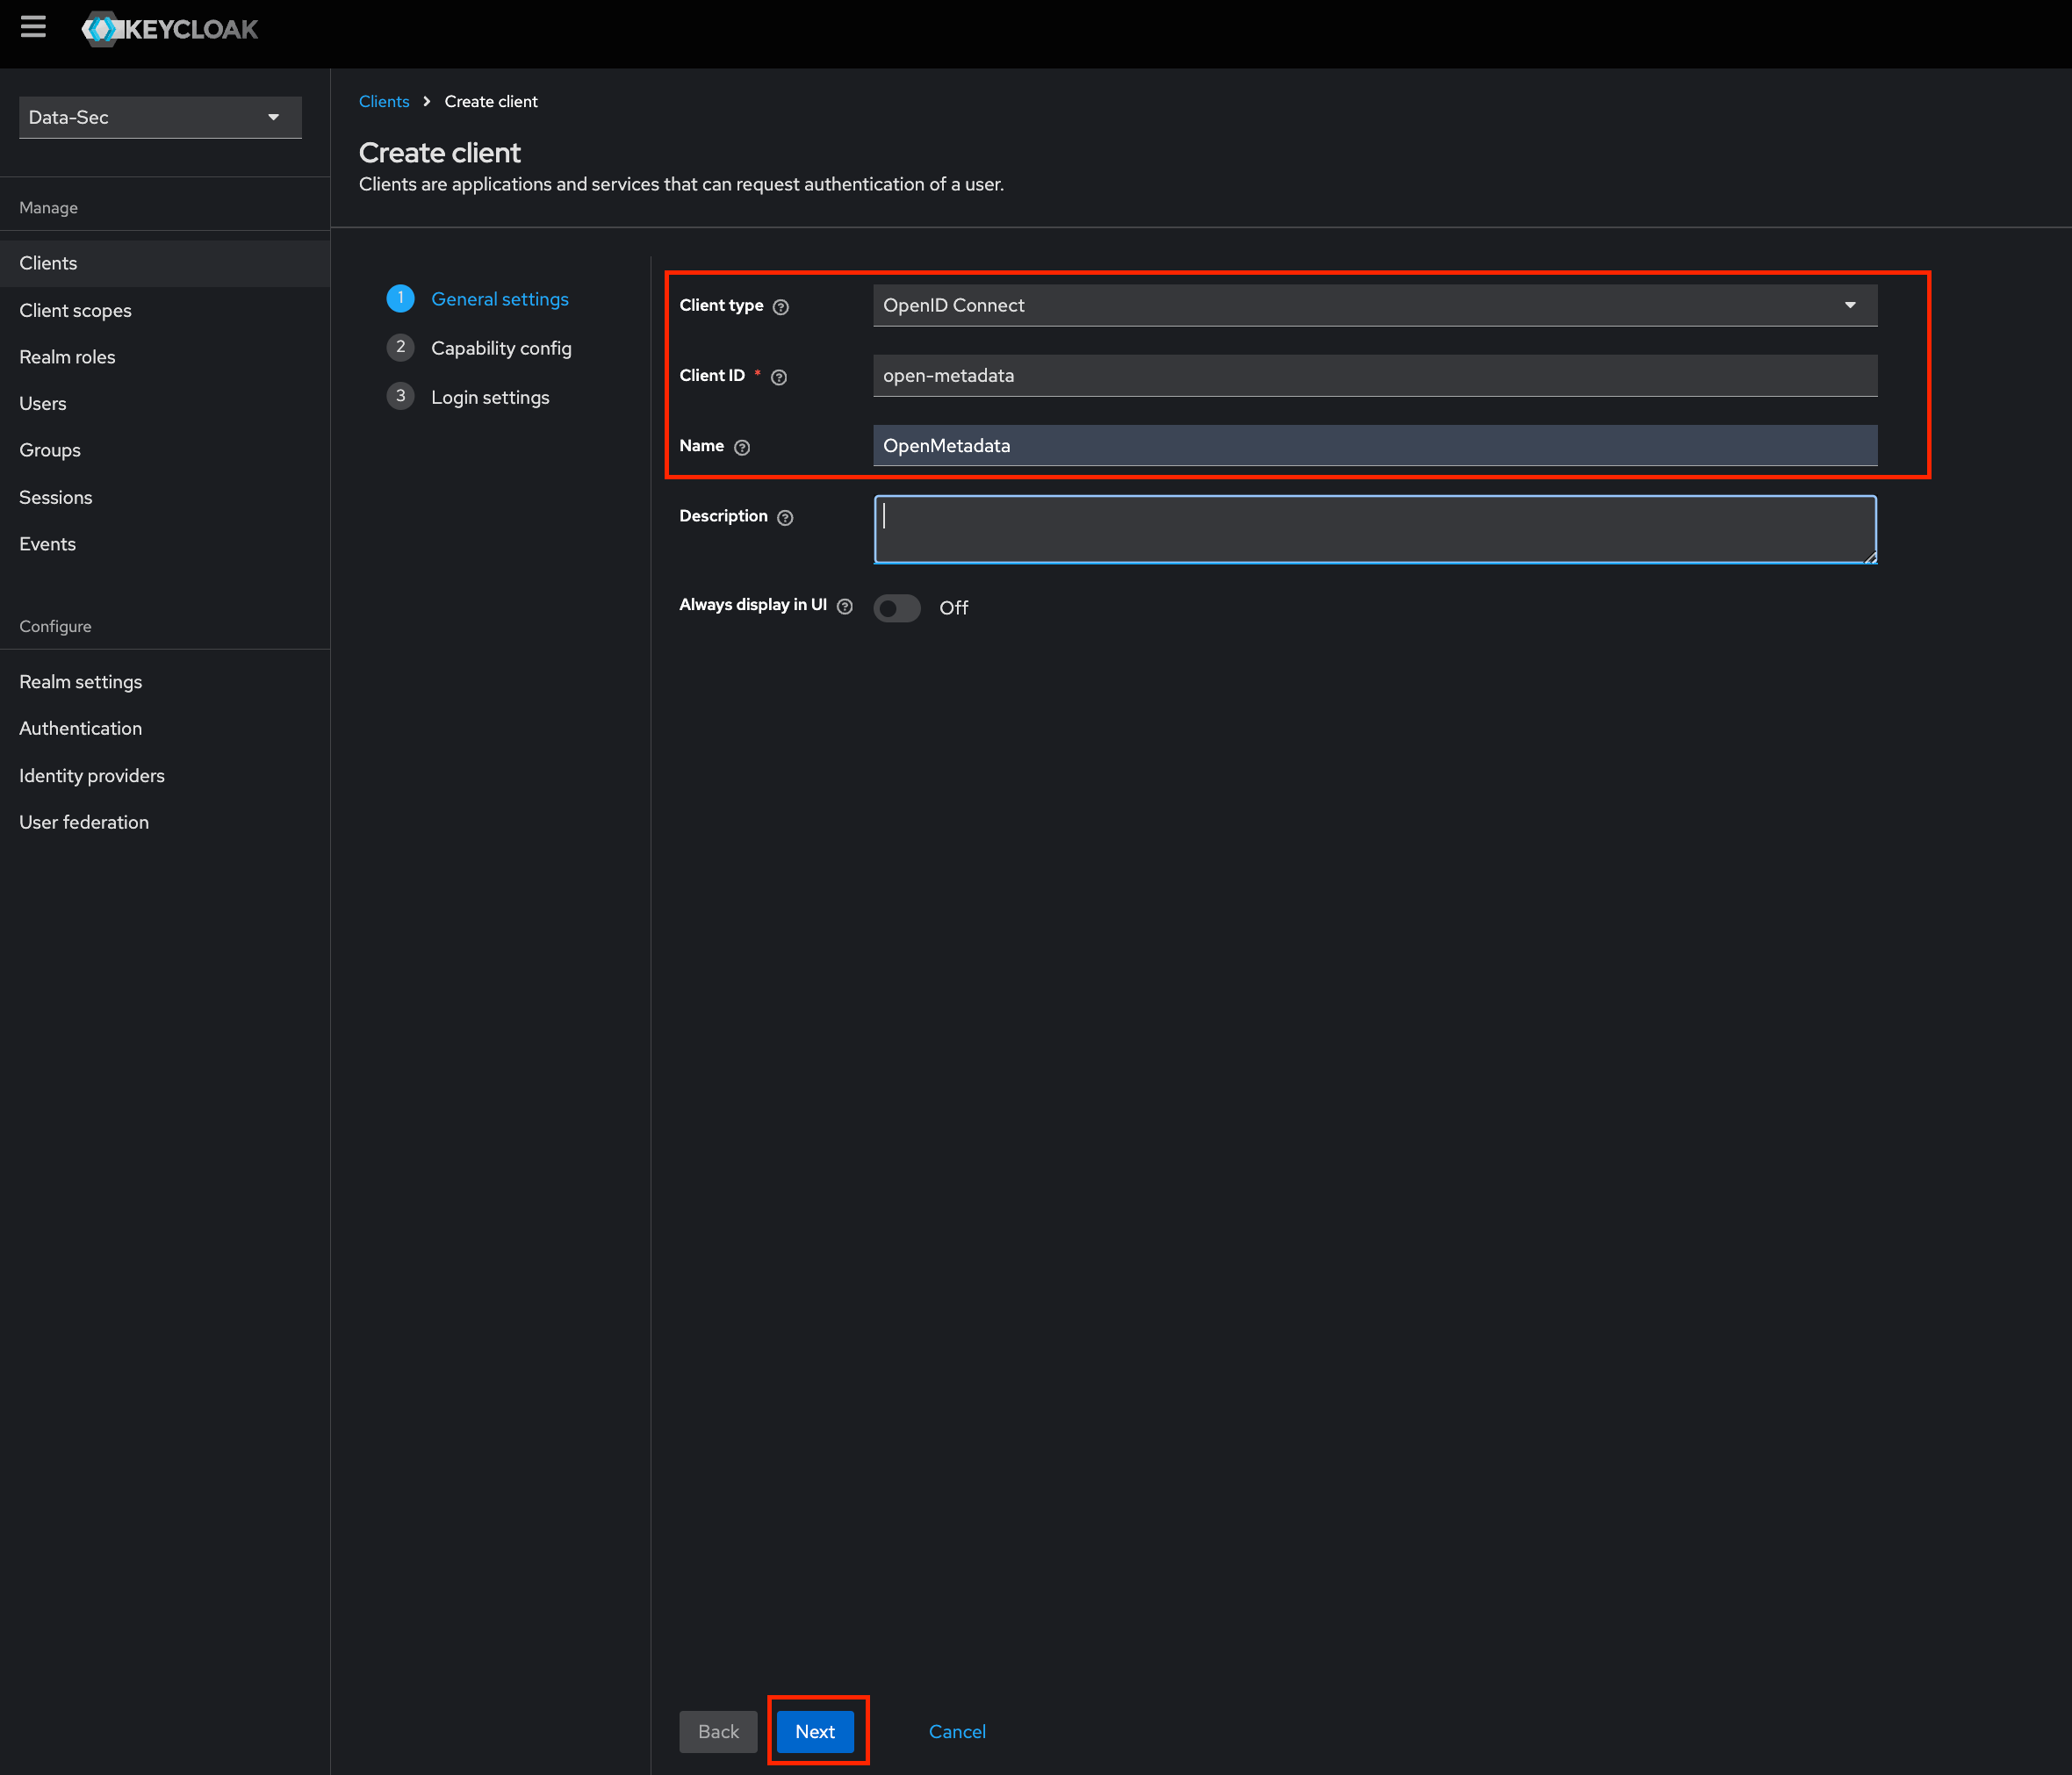
* Click on `Clients` in the menu.
* Click on `Create Client` button.
* Select the `Client type`.
* Enter the `Client ID`.
* Enter the Name and Description `(Optional)`.
* Click on `Next` button.
 ### Step 2: Edit Configs of the client
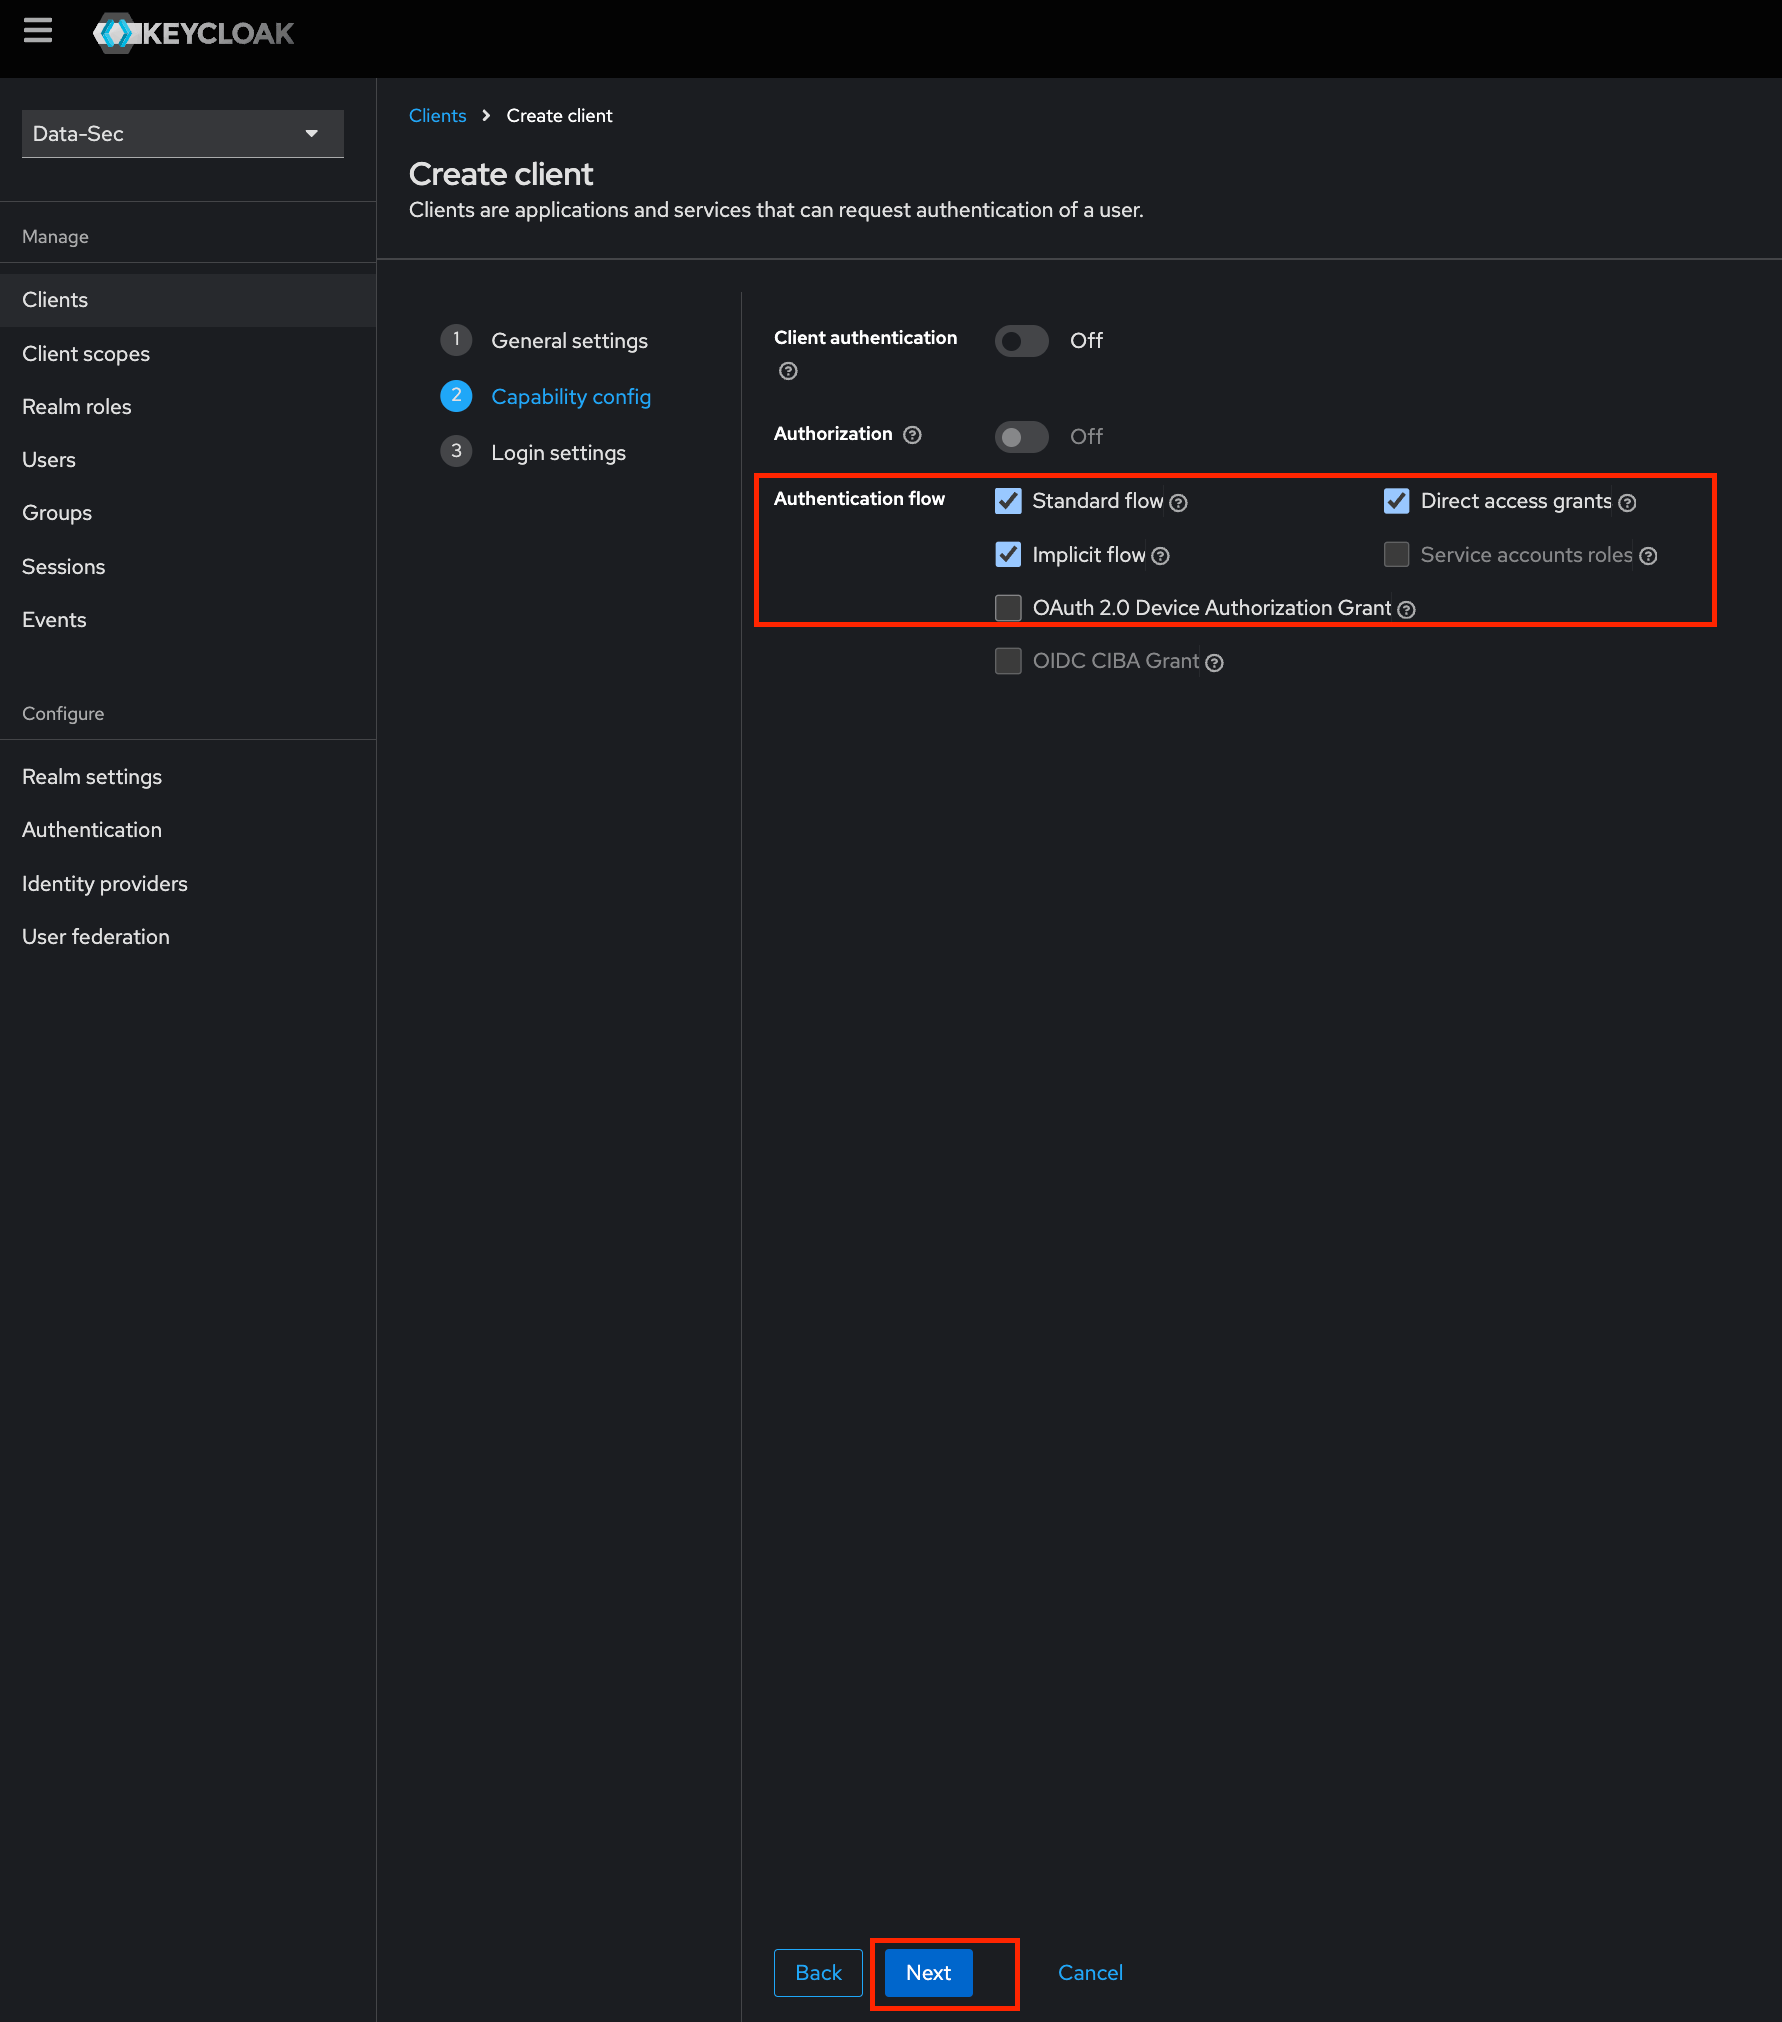
* Select `Standard flow` and `Implicit flow` as an `Authentication flow`.
* Click `Next`.
### Step 2: Edit Configs of the client
* Select `Standard flow` and `Implicit flow` as an `Authentication flow`.
* Click `Next`.
 ### Step 3: Add Login Settings
* fill the required options
### Step 3: Add Login Settings
* fill the required options
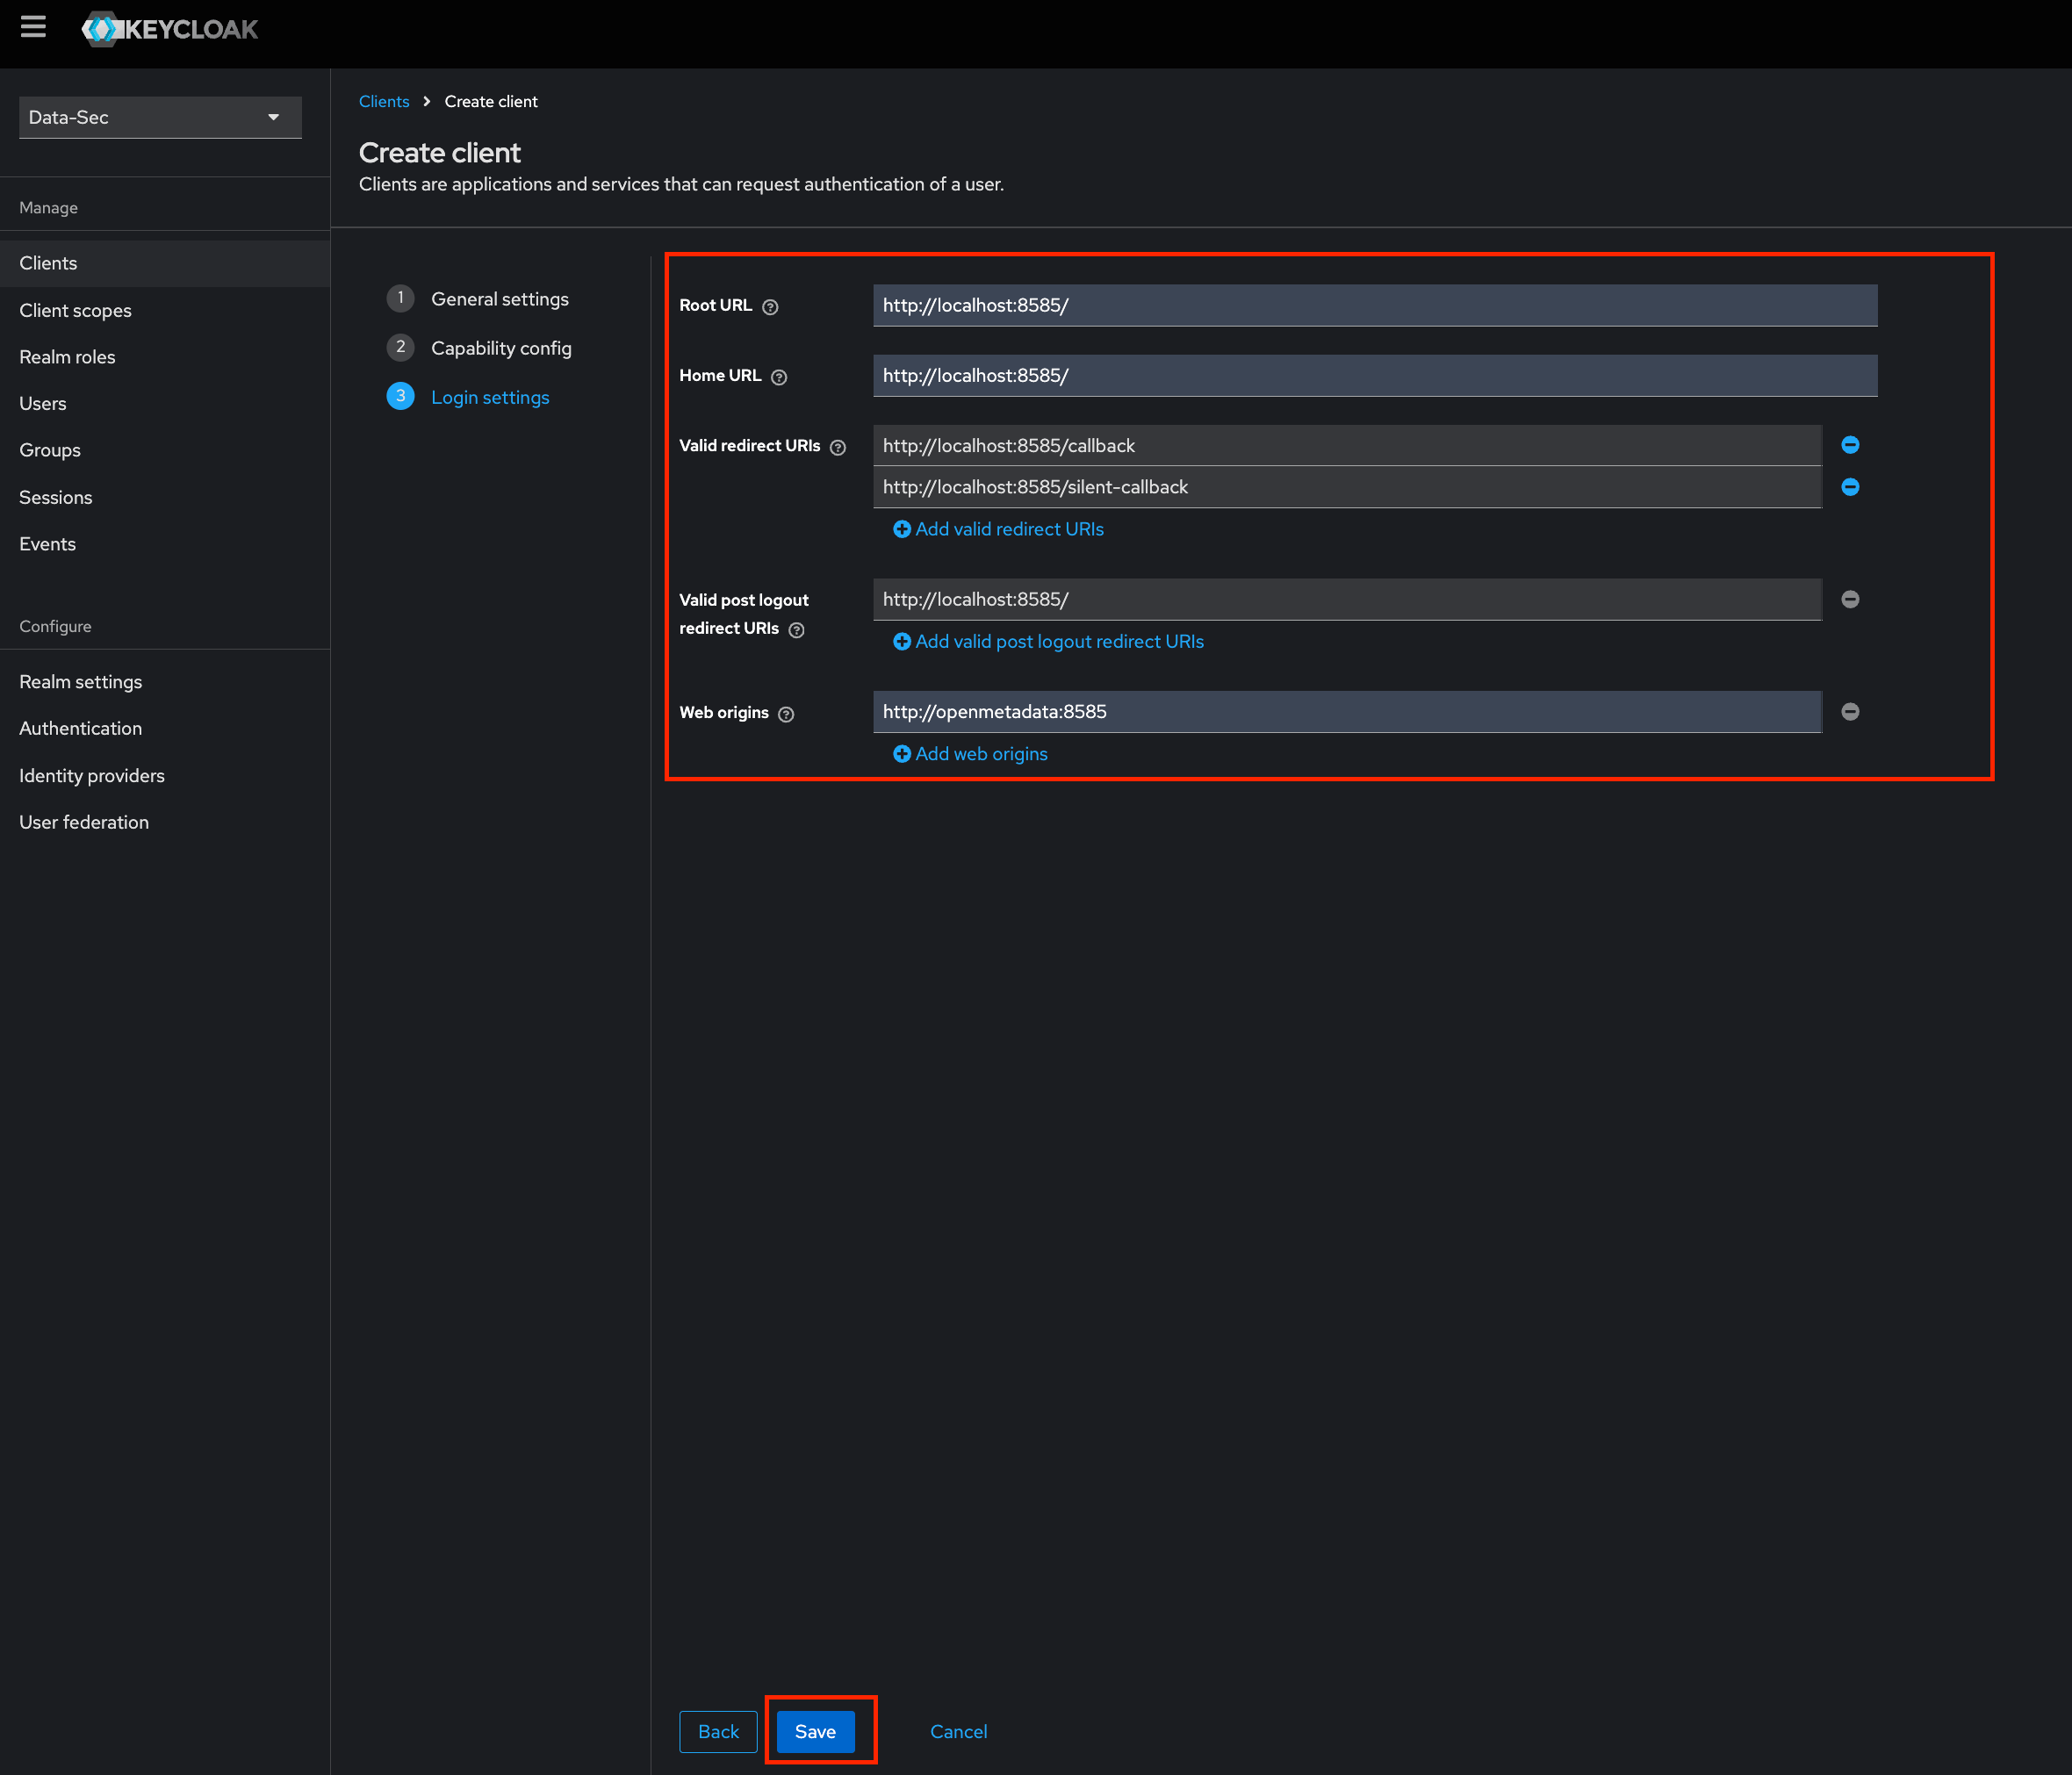 * Click on `Save` button.
Note: Scopes `openid`, `email` & `profile` are required to fetch the user details so you will have to add these scopes in your client.
After the applying these steps, the users in your realm are able to login in the openmetadata, as a suggestion create a user called "admin-user". Now you can update the configuration of your deployment:
Configure Keycloak SSO for your Docker Deployment.
Configure Keycloak SSO for your Bare Metal Deployment.
Configure Keycloak SSO for your Kubernetes Deployment.
Go to KeyCloak Configuration
* Click on `Save` button.
Note: Scopes `openid`, `email` & `profile` are required to fetch the user details so you will have to add these scopes in your client.
After the applying these steps, the users in your realm are able to login in the openmetadata, as a suggestion create a user called "admin-user". Now you can update the configuration of your deployment:
Configure Keycloak SSO for your Docker Deployment.
Configure Keycloak SSO for your Bare Metal Deployment.
Configure Keycloak SSO for your Kubernetes Deployment.
Go to KeyCloak Configuration