> ## Documentation Index
> Fetch the complete documentation index at: https://openmetadata-add-ontology-explorer-docs.mintlify.site/llms.txt
> Use this file to discover all available pages before exploring further.
# Custom Connectors | Build & Extend OpenMetadata Easily
> Learn to build custom connectors for OpenMetadata to integrate any data source. Step-by-step guides, code examples, and best practices included.
# Custom Connectors
Each of the services support providing a Custom Connector. It should be a Python class available in the Python environment
running the ingestion process (e.g., EC2 instance, Airflow host, Docker Image...). It should also match specific constraints on the methods to implement and how to send the Entities to be
created.
In this guide, we'll walk through a possible implementation. The example is based on a Database Service, but the
process is the same for Pipelines, Dashboard or Messaging services.
Review the [OpenMetadata 2.0 custom connector examples](https://github.com/open-metadata/openmetadata-demo/tree/main/custom-connector) for a package, image, and CLI configuration example compatible with OpenMetadata 2.0.
Watch OpenMetadata's [Webinar on Custom Connectors](https://www.youtube.com/watch?v=fDUj30Ub9VE)
## Steps to Set Up a Custom Connector
### Step 1 - Prepare your Connector
A connector is a class that extends from `from metadata.ingestion.api.steps import Source`. It should implement
all the required methods in the [Source API reference](/v2.0.x-SNAPSHOT/api-reference/sdk/python/build-connector/source#for-consumers-of-openmetadata-ingestion-to-define-custom-connectors-in-their-own-package-with-same-namespace).
Review the [Custom Database connector example](https://github.com/open-metadata/OpenMetadata/blob/main/ingestion/tests/integration/custom_connectors/custom_database.py) for a complete `Source` implementation.
The important method is `_iter`. This generator function sends Create Entity Requests to the `Sink`. Read more about the `Workflow` in the [Python SDK reference](/v2.0.x-SNAPSHOT/api-reference/sdk/python/build-connector).
### Step 2 - Yield the Data
The `Sink` is expecting Create Entity Requests. To get familiar with the Python SDK and understand how to create
the different Entities, a recommended read is the Python SDK [docs](/v2.0.x-SNAPSHOT/sdk/python).
We do not have docs and examples of all the supported Services. To see how to create and fetch
other types of Entities, refer to the `ometa` [integration tests](https://github.com/open-metadata/OpenMetadata/tree/main/ingestion/tests/integration/ometa).
#### Either & StackTraceError
When we `yield` the data, we are now wrapping the state of the execution being correct or not with an `Either` class:
```python theme={null}
from metadata.ingestion.api.models import Either, StackTraceError
```
This `Either` will have a `left` or `right`, and we will either return:
* `right` with the correct `CreateEntityRequest`
* `left` with the exception that we want to track with `StackTraceError`.
For example:
```python theme={null}
try:
1 / 0
except Exception:
yield Either(
left=StackTraceError(
name="My Error",
error="Demoing one error",
stack_trace=traceback.format_exc(),
)
)
for row in self.data:
yield Either(
right=CreateTableRequest(
...
)
)
```
Note that with the new structure, any errors are going to be properly logged at the end of the execution as:
```
+--------+---------------+-------------------+--------------------------------------------------------------------------------------------------------------------------+
| From | Entity Name | Message | Stack Trace |
+========+===============+===================+==========================================================================================================================+
| Source | My Error | Demoing one error | Traceback (most recent call last): |
| | | | File "/Users/pmbrull/github/openmetadata-demo/custom-connector/connector/my_csv_connector.py", line 182, in yield_data |
| | | | 1 / 0 |
| | | | ZeroDivisionError: division by zero |
+--------+---------------+-------------------+--------------------------------------------------------------------------------------------------------------------------+
```
### Step 3 - Prepare the Package Installation
Package the code so the ingestion container can install and use it. Add a `setup.py` or `pyproject.toml` file to your connector package.
### Step 4 - Prepare the Ingestion Image
If you want to use the connector from the UI, the Python environment running the ingestion process should contain
the new code you just created. For example, if running via Docker, the `openmetadata-ingestion` image should be
aware of your new package.
Use the ingestion image tag that matches your deployed OpenMetadata version. For example:
```Dockerfile theme={null}
# Base image from the right version
FROM openmetadata/ingestion:
# Let's use the same workdir as the ingestion image
WORKDIR ingestion
USER airflow
# Install our custom connector
# For a PROD image, this could be picking up the package from your private package index
COPY connector connector
COPY setup.py .
RUN pip install --no-deps .
```
### Step 5 - Run OpenMetadata with the Custom Ingestion Image
Build and run the custom ingestion image with your deployment method, such as Docker Compose or Kubernetes.
### Step 6 - Configure the Connector
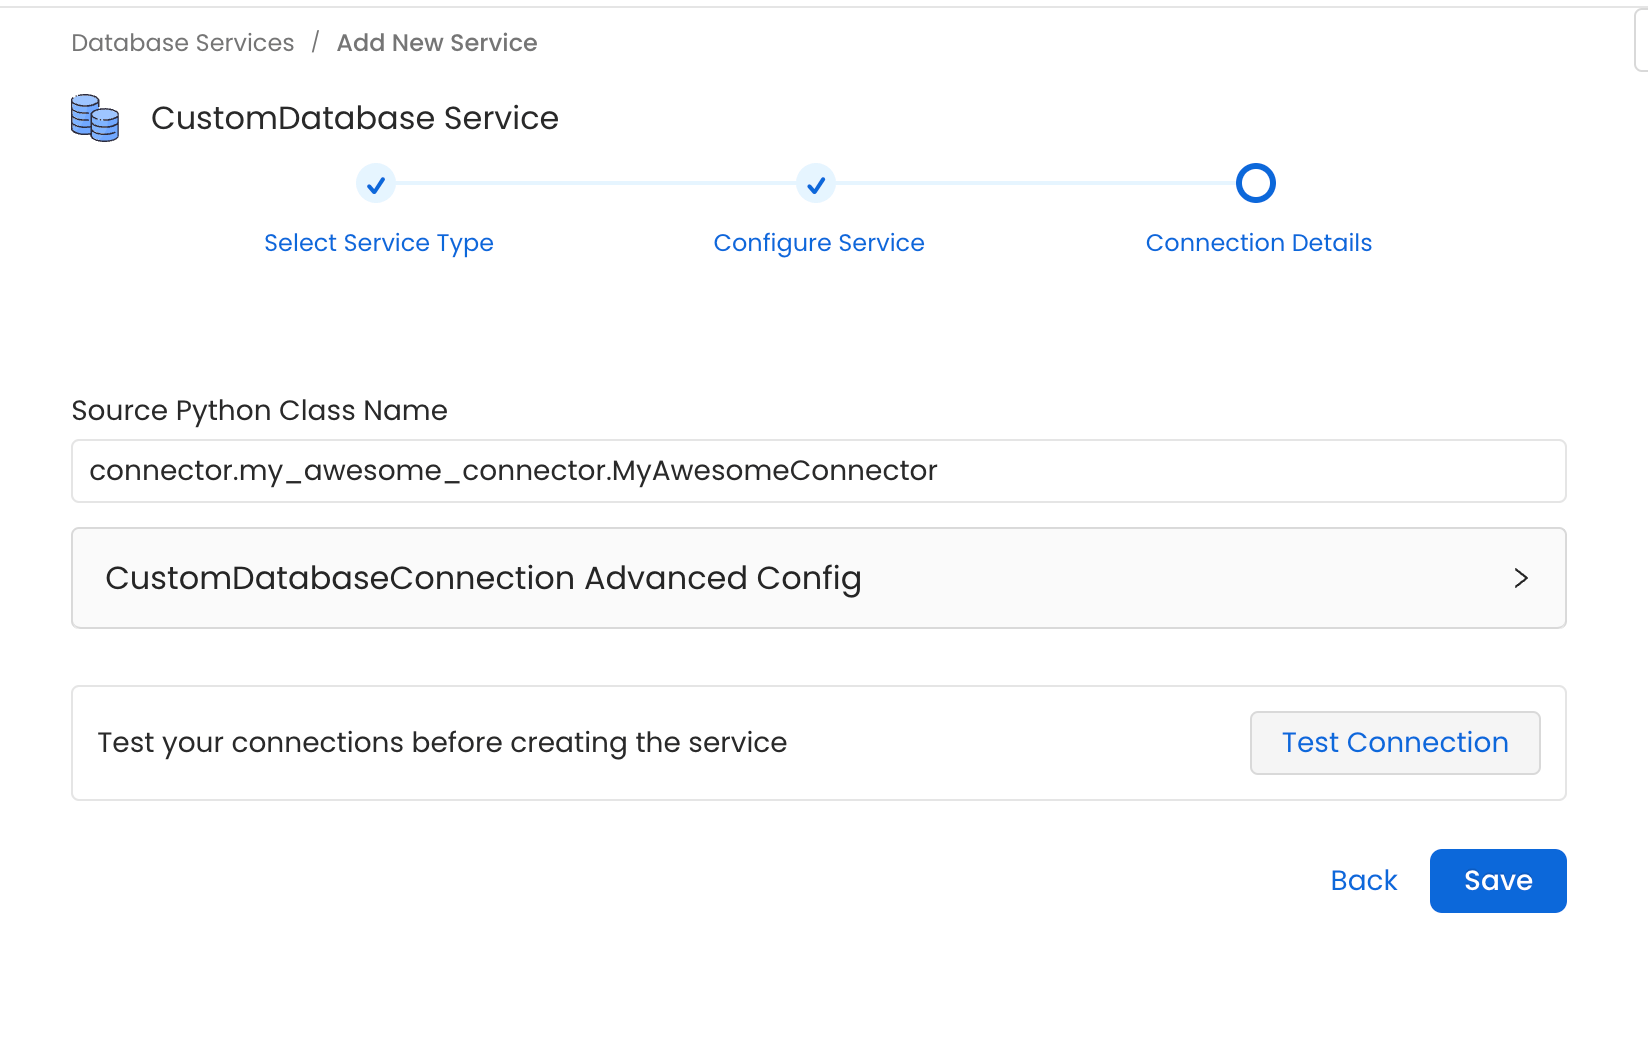
In the example we prepared a Database Connector. Thus, go to `Database Services > Add New Service > Custom`
and set the `Source Python Class Name` as `connector.my_awesome_connector.MyAwesomeConnector`.
Note how we are specifying the full module name so that the Ingestion Framework can import the Source class.