> ## Documentation Index
> Fetch the complete documentation index at: https://openmetadata-add-ontology-explorer-docs.mintlify.site/llms.txt
> Use this file to discover all available pages before exploring further.
# Auth0 SSO for Docker | OpenMetadata Deployment Guide
> Implement Auth0 Authorization Code Flow to manage user authentication securely with backend service token exchange and login session tracking.
# Auth Code Flow
### Step 1: Create a New Application
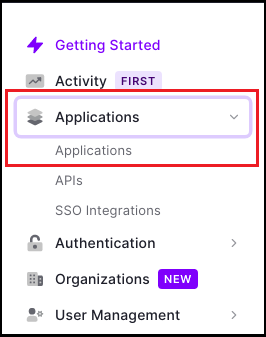
* Once you are on the Dashboard page, click on `Applications > Applications` available on the left-hand side panel.
 * Click on `Create Application`.
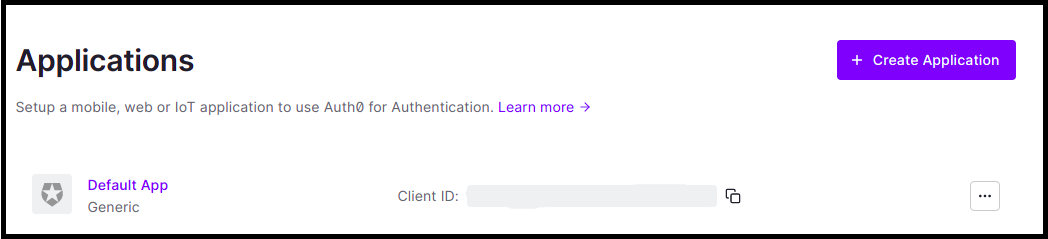 * Enter the Application name.
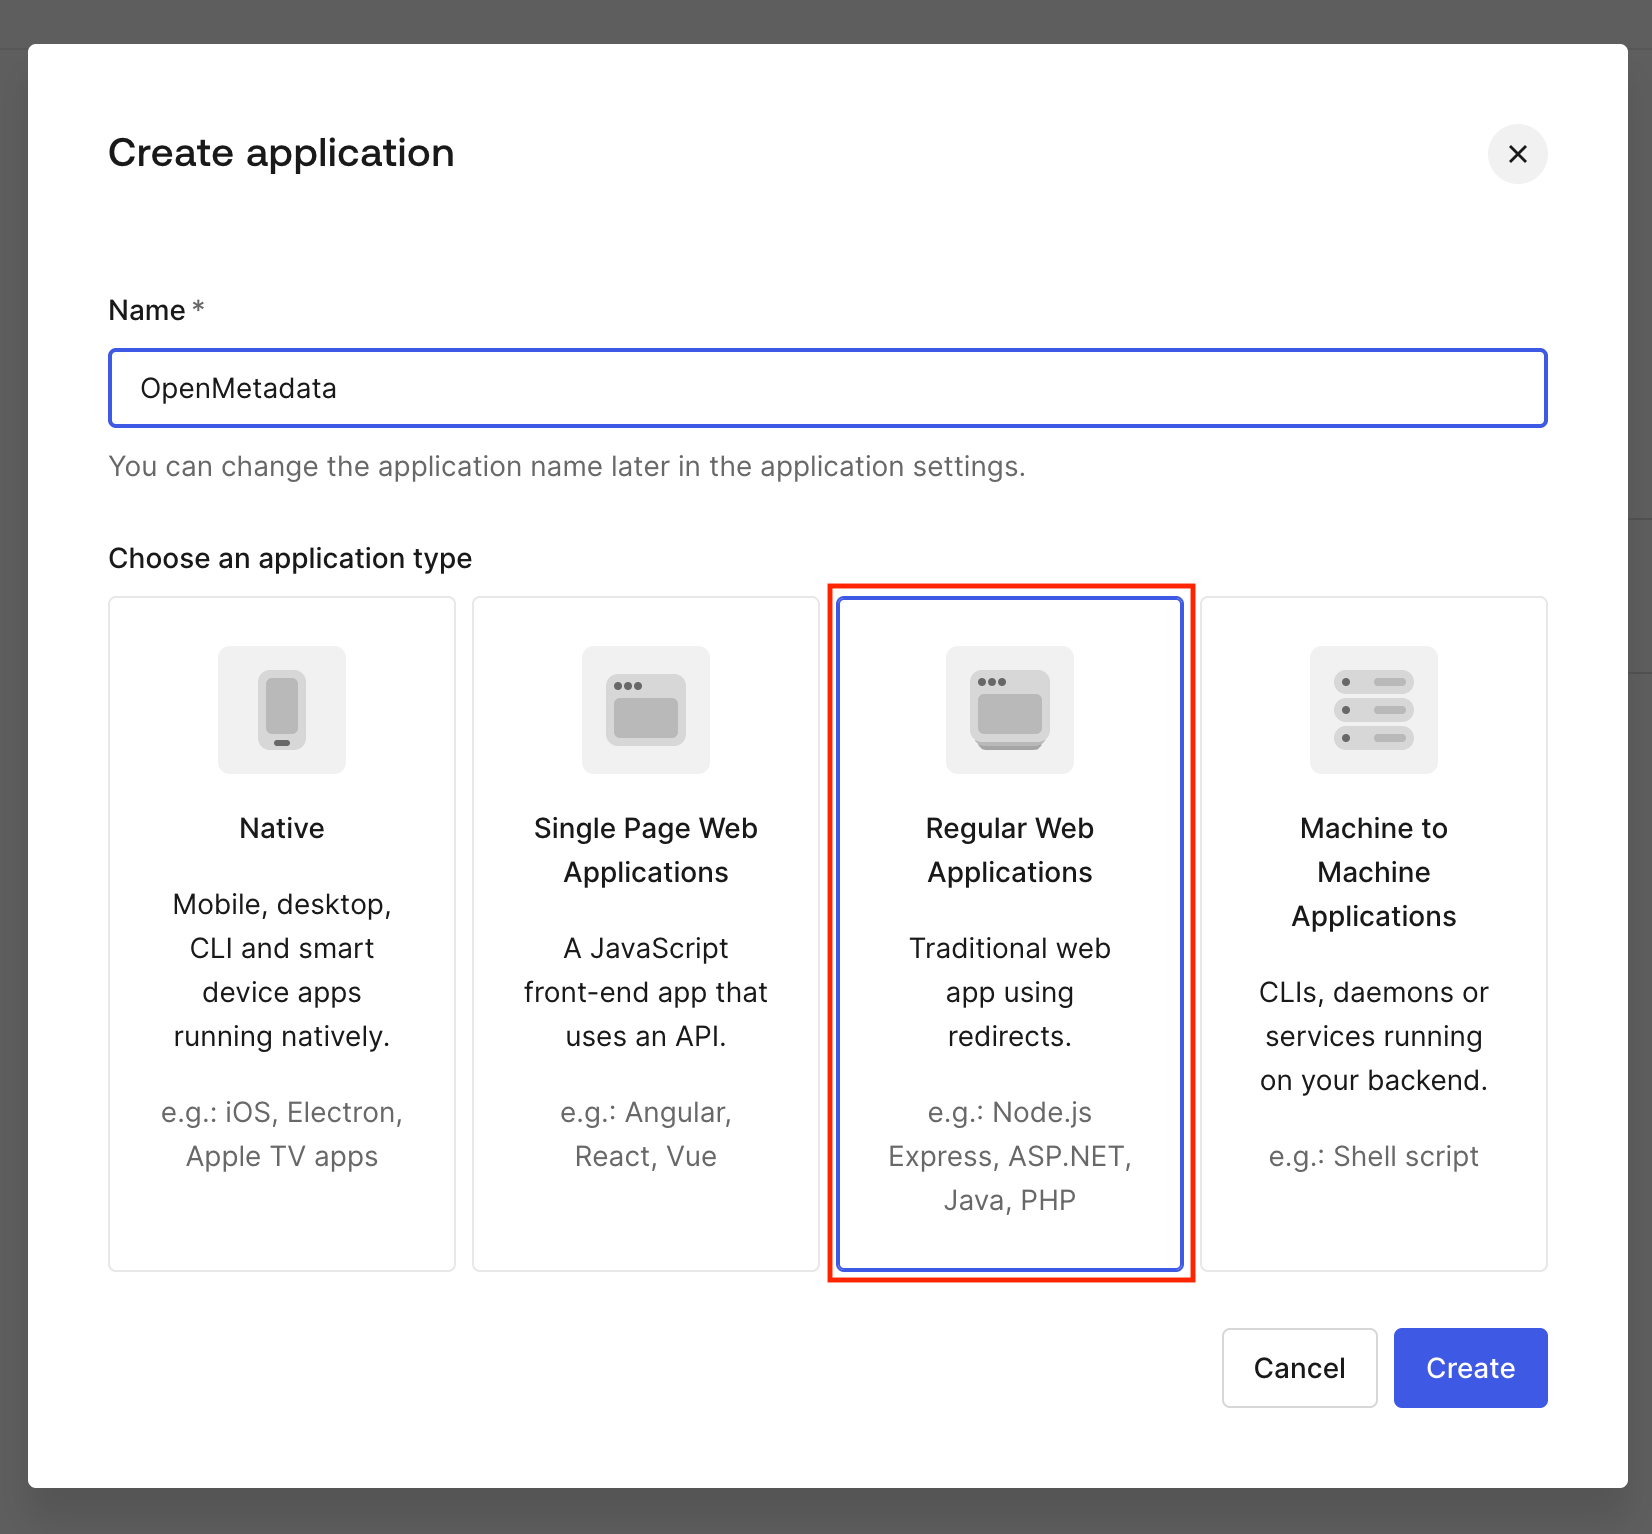
* Choose an application type and click on `Create`.
* Enter the Application name.
* Choose an application type and click on `Create`.
 ### Step 2: Where to Find the Credentials
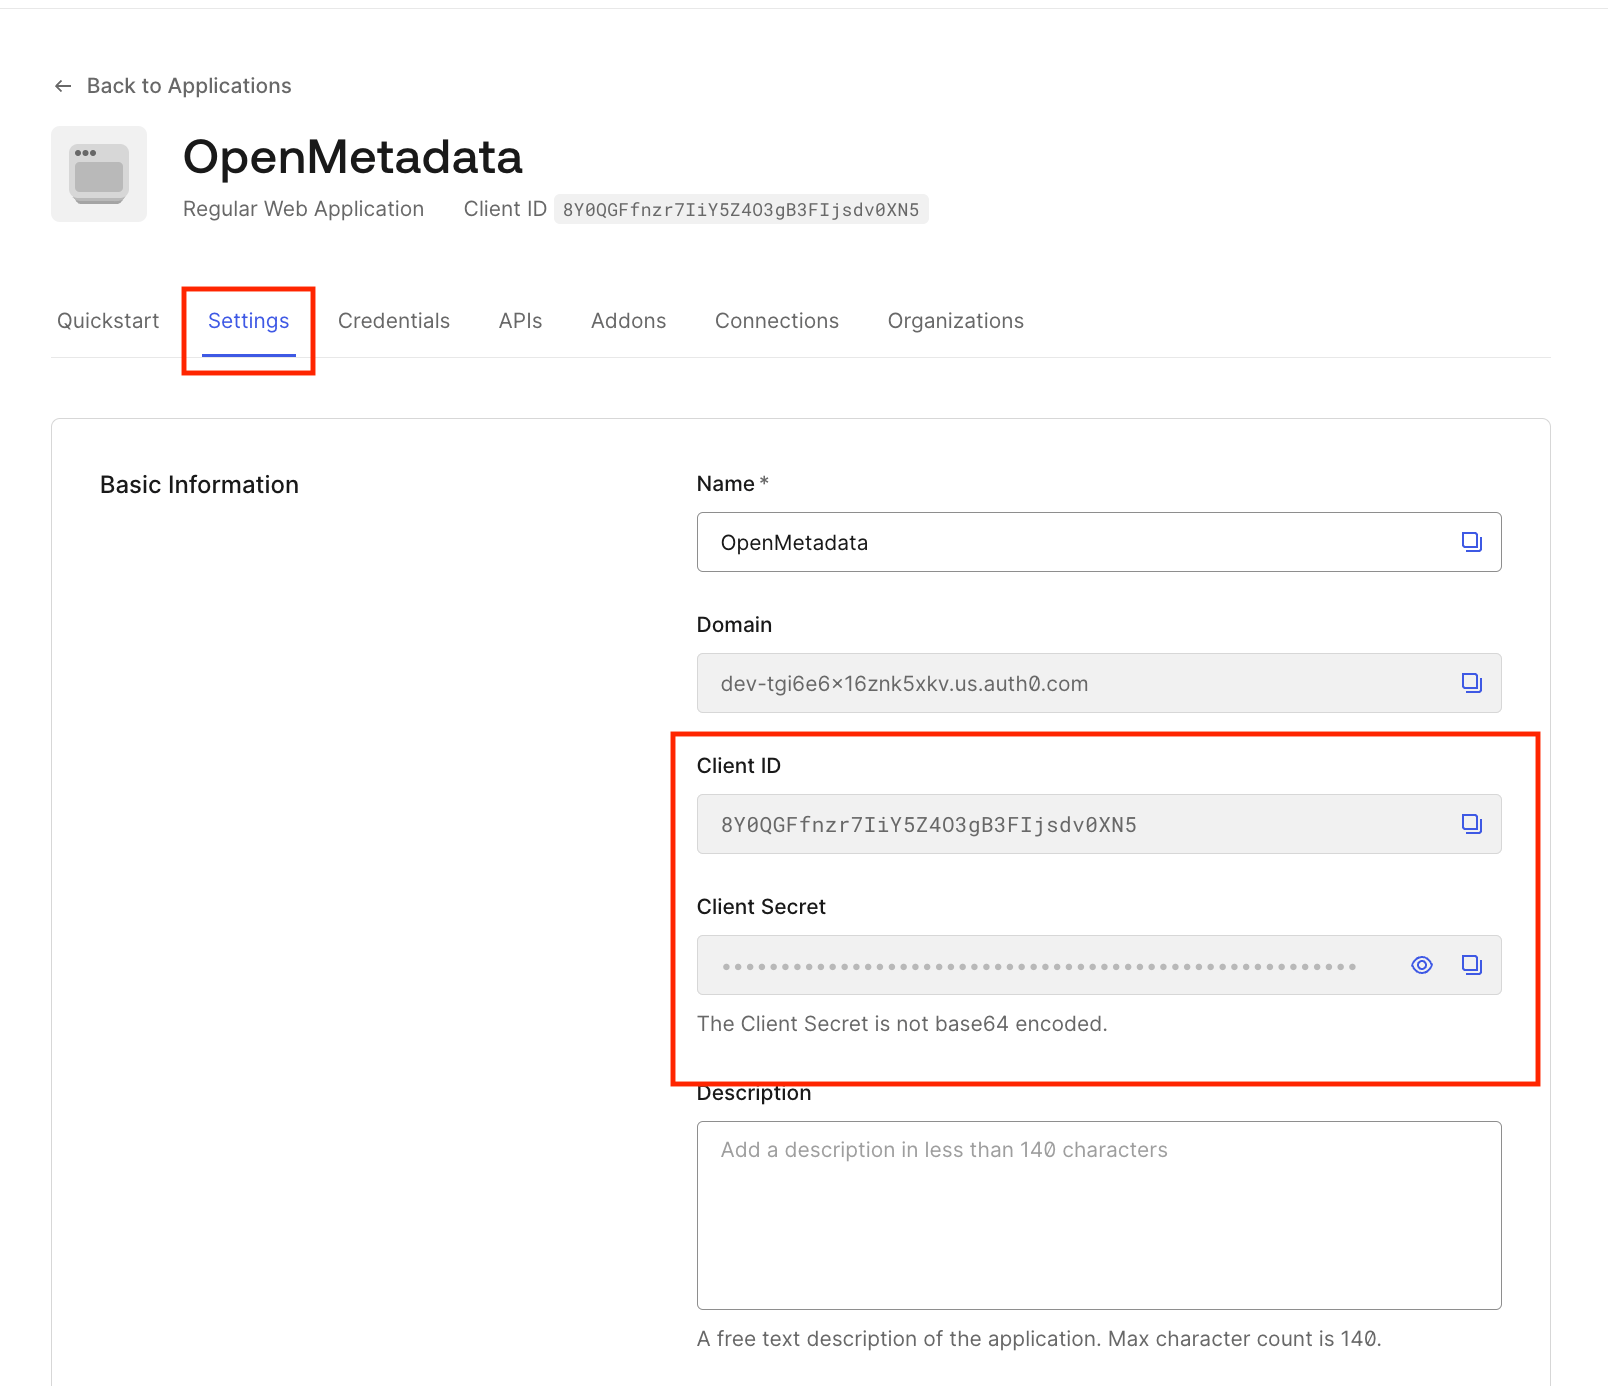
* Navigate to the Settings tab.
* You will find your `Client ID` and `Client Secret`.
### Step 2: Where to Find the Credentials
* Navigate to the Settings tab.
* You will find your `Client ID` and `Client Secret`.
 After the applying these steps, you can update the configuration of your deployment:
Configure Auth0 SSO for your Docker Deployment.
Configure Auth0 SSO for your Bare Metal Deployment.
Configure Auth0 SSO for your Kubernetes Deployment.
Go to Auth0 Configuration
After the applying these steps, you can update the configuration of your deployment:
Configure Auth0 SSO for your Docker Deployment.
Configure Auth0 SSO for your Bare Metal Deployment.
Configure Auth0 SSO for your Kubernetes Deployment.
Go to Auth0 Configuration